Claude Code से Design System बनाएं: Design Tokens, Storybook और CI
Claude Code के साथ design tokens, React घटक, Storybook, accessibility, visual test और CI लागू करने की व्यावहारिक गाइड।

जब हर स्क्रीन पर एक ही Button अलग दिखाई दे
किसी SaaS टीम में एक साधारण बदलाव अक्सर बड़ी परेशानी बन जाता है। डिज़ाइनर primary button का नीला रंग बदलता है, लेकिन dashboard, billing और mobile web में तीन अलग hex values इस्तेमाल हो रही होती हैं। एक जगह focus ring गायब है, दूसरी जगह loading state में दो बार submit हो जाता है, और तीसरी जगह Storybook story पुरानी है। बदलाव छोटा था, पर जांच कई स्क्रीन पर करनी पड़ती है।
यही वह समस्या है जिसे design system हल करता है। Design system केवल सुंदर घटकों की gallery नहीं, बल्कि रंग, spacing, typography, component states, review और test को एक ही नियम से चलाने की व्यवस्था है। Claude Code मौजूदा repository पढ़कर सीमित files बदल सकता है, Storybook और tests चला सकता है और diff समझा सकता है। फिर भी brand का अर्थ, public API, उपयोगकर्ता अनुभव और अंतिम accessibility निर्णय इंसान को ही लेना चाहिए।
यह गाइड बताती है कि tokens.json को code का contract कैसे बनाएं, React/TypeScript घटक कैसे तैयार करें, Storybook में states कैसे दर्ज करें और CI में Vitest तथा Playwright checks कैसे जोड़ें। संबंधित विषयों के लिए Claude Code से design token प्रबंधन, Storybook development workflow और accessibility review भी देखें।
इस लेख के मुख्य बिंदु
tokens.jsonको review और CI से जांचे जा सकने वाला source of truth बनाएं।- Claude Code को पूरी library दोबारा लिखने के बजाय एक component और स्पष्ट file scope दें।
- 2026 में Vite आधारित Storybook के लिए
@storybook/addon-vitestऔरvitest --project=storybookको प्राथमिक setup मानें। - automated a11y और visual tests उपयोगी हैं, पर keyboard और screen reader की मानवीय समीक्षा का विकल्प नहीं हैं।
- Figma से पहले difference report बनाएं; production tokens को अपने आप overwrite न करें।
शुरुआत में केवल एक महत्वपूर्ण component चुनें। उसके token, props, Storybook states और CI checks को पूरा करने के बाद ही अगला component migrate करें। इससे diff छोटा रहता है और regression का कारण ढूंढना आसान होता है।
लक्ष्य architecture
इस workflow में code की सच्चाई tokens.json में रहती है। Figma design exploration और review के लिए जरूरी है, लेकिन product में जाने वाला बदलाव ऐसा contract होना चाहिए जिसे pull request में पढ़ा और CI में जांचा जा सके।
flowchart LR
  Figma["Figma Variables"]
  Tokens["tokens.json"]
  Build["token build script"]
  CSS["CSS variables"]
  TS["TypeScript token map"]
  Components["React components"]
  Storybook["Storybook stories"]
  CI["Visual and a11y CI"]

  Figma -->|review input| Tokens
  Tokens --> Build
  Build --> CSS
  Build --> TS
  CSS --> Components
  TS --> Components
  Components --> Storybook
  Storybook --> CI
Design tokens नाम दिए हुए design decisions हैं। इनमें colors, spacing, radius, typography और component states data के रूप में रखे जाते हैं। Component में सीधे #2563eb लिखने के बजाय action.background.primary जैसा semantic token बताता है कि उस रंग का काम क्या है। Brand बदलने पर semantic अर्थ स्थिर रह सकता है, जबकि raw value बदलती है।
मौजूदा specification और tooling के लिए Design Tokens Community Group format, Claude Code documentation, Claude Code security guidance, Storybook Vitest addon, Storybook accessibility testing, Storybook visual testing और Figma REST API देखें।
Claude Code का काम और इंसान का निर्णय
“Design system बना दो” जैसा prompt बहुत बड़ा है। इससे कई files बदल सकती हैं, public API टूट सकती है और review कठिन हो सकता है। बेहतर निर्देश है: “केवल Button migrate करो, मौजूदा public API बनाए रखो, Storybook में सभी states जोड़ो और a11y checks चलाओ।”
| कार्य क्षेत्र | Claude Code को सौंपें | इंसान तय करे |
|---|---|---|
| Tokens | CSS में दोहराए गए colors और spacing निकालना | Brand का अर्थ और token names |
| Components | typed Button, Input, Alert primitives बनाना | Public API और product semantics |
| Storybook | variants, states और interaction stories जोड़ना | वास्तविक workflow में जरूरी states |
| Accessibility | missing labels, focus issues और axe violations खोजना | अंतिम keyboard, screen reader और UX निर्णय |
| CI | pull request में visual और a11y checks जोड़ना | failure policy और exception process |
Claude Code edit शुरू करने से पहले उसे यह सीमित नियम दें:
Design system कार्य के नियम:
- केवल src/components, src/styles, .storybook, tests, scripts और tokens.json बदलें।
- पुराने और नए token names की सूची दिए बिना brand colors न बदलें।
- हर नए component में TypeScript props, keyboard व्यवहार, Storybook stories और a11y notes हों।
- पूरा बताने से पहले npm run tokens:build, npm run test:storybook -- --run, npm run build-storybook और npm run test:visual चलाएं।
- focus व्यवहार बदले तो manual review के चरण लिखें।
मानव reviewer file scope, token naming, API compatibility, visual diff और keyboard व्यवहार देखता है। Claude Code repetitive extraction, implementation और command execution संभालता है। Figma token, npm token, CI secret या निजी ग्राहक screenshot prompt में न डालें। Commands approve करने से पहले पढ़ें और बड़े snapshot update को मानवीय स्वीकृति के बिना merge न करें।
न्यूनतम setup: 2026 का Storybook मार्ग
यह उदाहरण React और TypeScript application मानता है। Package manager अलग हो तो commands बदलें, लेकिन dependency की भूमिका समान रखें।
npm install class-variance-authority clsx tailwind-merge
npx storybook@latest init
npx storybook add @storybook/addon-a11y
npx storybook add @storybook/addon-vitest
npm install -D @playwright/test concurrently http-server wait-on
npx playwright install chromium
Vite आधारित Storybook framework या supported Next.js Vite integration में वर्तमान अनुशंसित component-test setup @storybook/addon-vitest है। Project उस integration पर नहीं चल सकता तो Storybook के पुराने @storybook/test-runner को केवल fallback या migration bridge की तरह official documentation के अनुसार रखें; उसे नए setup की पहली पसंद न बनाएं।
Local और CI दोनों में एक ही commands चलाने के लिए scripts तय करें:
{
  "scripts": {
    "tokens:build": "node scripts/build-tokens.mjs",
    "storybook": "storybook dev -p 6006",
    "build-storybook": "storybook build",
    "test:storybook": "vitest --project=storybook",
    "test:visual": "playwright test tests/button.visual.spec.ts"
  }
}
npm run test:storybook -- --run CI में एक बार tests चलाकर process बंद करता है। Vitest addon story files को browser tests में बदलता है; इसलिए component और a11y test के लिए अलग Storybook server चलाना जरूरी नहीं। नीचे का built server केवल custom Playwright screenshot के लिए है।
Design Tokens को contract बनाएं
Tokens को primitive, semantic और component layers में बांटें। Primitive layer raw value रखती है, semantic layer उपयोग का अर्थ बताती है और component layer किसी खास UI state का contract बनाती है। इस separation से brand color बदलते समय हर component खोजना नहीं पड़ता।
{
  "$schema": "https://www.designtokens.org/schemas/2025.10/format.json",
  "primitive": {
    "color": {
      "blue": {
        "50": {
          "$type": "color",
          "$value": { "colorSpace": "srgb", "components": [0.9373, 0.9647, 1], "hex": "#eff6ff" }
        },
        "600": {
          "$type": "color",
          "$value": { "colorSpace": "srgb", "components": [0.1451, 0.3882, 0.9216], "hex": "#2563eb" }
        },
        "700": {
          "$type": "color",
          "$value": { "colorSpace": "srgb", "components": [0.1137, 0.3059, 0.8471], "hex": "#1d4ed8" }
        }
      },
      "gray": {
        "50": {
          "$type": "color",
          "$value": { "colorSpace": "srgb", "components": [0.9765, 0.9804, 0.9843], "hex": "#f9fafb" }
        },
        "200": {
          "$type": "color",
          "$value": { "colorSpace": "srgb", "components": [0.898, 0.9059, 0.9216], "hex": "#e5e7eb" }
        },
        "900": {
          "$type": "color",
          "$value": { "colorSpace": "srgb", "components": [0.0667, 0.0941, 0.1529], "hex": "#111827" }
        }
      },
      "red": {
        "600": {
          "$type": "color",
          "$value": { "colorSpace": "srgb", "components": [0.8627, 0.149, 0.149], "hex": "#dc2626" }
        },
        "700": {
          "$type": "color",
          "$value": { "colorSpace": "srgb", "components": [0.7255, 0.1098, 0.1098], "hex": "#b91c1c" }
        }
      },
      "white": {
        "$type": "color",
        "$value": { "colorSpace": "srgb", "components": [1, 1, 1], "hex": "#ffffff" }
      }
    },
    "space": {
      "2": { "$type": "dimension", "$value": { "value": 0.5, "unit": "rem" } },
      "3": { "$type": "dimension", "$value": { "value": 0.75, "unit": "rem" } },
      "4": { "$type": "dimension", "$value": { "value": 1, "unit": "rem" } },
      "6": { "$type": "dimension", "$value": { "value": 1.5, "unit": "rem" } }
    },
    "radius": {
      "md": { "$type": "dimension", "$value": { "value": 0.375, "unit": "rem" } },
      "lg": { "$type": "dimension", "$value": { "value": 0.5, "unit": "rem" } }
    }
  },
  "semantic": {
    "color": {
      "surface": { "$type": "color", "$value": "{primitive.color.white}" },
      "text": { "$type": "color", "$value": "{primitive.color.gray.900}" },
      "border": { "$type": "color", "$value": "{primitive.color.gray.200}" },
      "focus": { "$type": "color", "$value": "{primitive.color.blue.600}" }
    }
  },
  "component": {
    "button": {
      "primary": {
        "background": { "$type": "color", "$value": "{primitive.color.blue.600}" },
        "backgroundHover": { "$type": "color", "$value": "{primitive.color.blue.700}" },
        "text": { "$type": "color", "$value": "{primitive.color.white}" }
      },
      "danger": {
        "background": { "$type": "color", "$value": "{primitive.color.red.600}" },
        "backgroundHover": { "$type": "color", "$value": "{primitive.color.red.700}" },
        "text": { "$type": "color", "$value": "{primitive.color.white}" }
      }
    }
  }
}
इस file से CSS custom properties और TypeScript token map बनाएं:
import { mkdirSync, readFileSync, writeFileSync } from "node:fs";
import { dirname } from "node:path";

const source = JSON.parse(readFileSync("tokens.json", "utf8"));

function getToken(path) {
  const node = path.split(".").reduce((current, key) => current?.[key], source);
  if (!node || typeof node.$value === "undefined") {
    throw new Error(`Unknown token reference: ${path}`);
  }
  return node.$value;
}

function resolveValue(value, stack = []) {
  if (typeof value === "string" && value.startsWith("{") && value.endsWith("}")) {
    const path = value.slice(1, -1);
    if (stack.includes(path)) {
      throw new Error(`Circular token reference: ${[...stack, path].join(" -> ")}`);
    }
    return resolveValue(getToken(path), [...stack, path]);
  }
  return value;
}

function toCssValue(value) {
  if (value && typeof value === "object") {
    if (typeof value.hex === "string") return value.hex;
    if (typeof value.value === "number" && typeof value.unit === "string") {
      return `${value.value}${value.unit}`;
    }
    throw new Error(`Unsupported token value: ${JSON.stringify(value)}`);
  }
  return String(value);
}

function walk(node, pathParts = [], result = {}) {
  if (!node || typeof node !== "object") return result;

  if (node && typeof node === "object" && typeof node.$value !== "undefined") {
    result[pathParts.join("-")] = toCssValue(resolveValue(node.$value));
    return result;
  }

  for (const [key, value] of Object.entries(node)) {
    if (key.startsWith("$")) continue;
    walk(value, [...pathParts, key], result);
  }

  return result;
}

const flat = walk(source);
const css = [
  ":root {",
  ...Object.entries(flat).map(([name, value]) => `  --${name}: ${value};`),
  "}",
  ""
].join("\n");

mkdirSync(dirname("src/styles/tokens.css"), { recursive: true });
mkdirSync(dirname("src/tokens.ts"), { recursive: true });
writeFileSync("src/styles/tokens.css", css);
writeFileSync("src/tokens.ts", `export const tokens = ${JSON.stringify(flat, null, 2)} as const;\n`);

console.log(`Generated ${Object.keys(flat).length} tokens.`);
पहला prompt “सभी UI बदलो” न हो। पहले Claude Code से repeated raw colors और spacing की सूची, प्रस्तावित token mapping और प्रभावित files की report मांगें। Report स्वीकार होने के बाद एक component migrate करें। इससे गलत semantic नाम पूरे codebase में फैलने से बचता है।
Typed React component बनाएं
Component layer जानबूझकर साधारण और अनुमान लगाने योग्य होनी चाहिए। नीचे का Button variants, sizes, loading, disabled और दिखाई देने वाला focus treatment देता है। Reviewer को केवल appearance नहीं, props की स्थिरता और native button व्यवहार देखना है।
import { forwardRef, type ButtonHTMLAttributes } from "react";
import { cva, type VariantProps } from "class-variance-authority";
import { clsx, type ClassValue } from "clsx";
import { twMerge } from "tailwind-merge";

function cn(...inputs: ClassValue[]) {
  return twMerge(clsx(inputs));
}

const buttonVariants = cva(
  [
    "inline-flex items-center justify-center gap-2 rounded-md font-medium",
    "transition-colors focus-visible:outline-none focus-visible:ring-2",
    "focus-visible:ring-[var(--semantic-color-focus)] focus-visible:ring-offset-2",
    "disabled:pointer-events-none disabled:opacity-50"
  ],
  {
    variants: {
      variant: {
        primary: [
          "bg-[var(--component-button-primary-background)]",
          "text-[var(--component-button-primary-text)]",
          "hover:bg-[var(--component-button-primary-backgroundHover)]"
        ],
        secondary: "border border-[var(--semantic-color-border)] bg-[var(--semantic-color-surface)] text-[var(--semantic-color-text)] hover:bg-gray-50",
        danger: [
          "bg-[var(--component-button-danger-background)]",
          "text-[var(--component-button-danger-text)]",
          "hover:bg-[var(--component-button-danger-backgroundHover)]"
        ]
      },
      size: {
        sm: "h-8 px-3 text-sm",
        md: "h-10 px-4 text-sm",
        lg: "h-12 px-6 text-base"
      }
    },
    defaultVariants: {
      variant: "primary",
      size: "md"
    }
  }
);

export interface ButtonProps
  extends ButtonHTMLAttributes<HTMLButtonElement>,
    VariantProps<typeof buttonVariants> {
  loading?: boolean;
}

export const Button = forwardRef<HTMLButtonElement, ButtonProps>(function Button(
  { className, variant, size, loading = false, disabled, children, ...props },
  ref
) {
  return (
    <button
      ref={ref}
      className={cn(buttonVariants({ variant, size }), className)}
      disabled={disabled || loading}
      aria-busy={loading || undefined}
      {...props}
    >
      {loading ? (
        <span
          aria-hidden="true"
          className="h-4 w-4 animate-spin rounded-full border-2 border-current border-r-transparent"
        />
      ) : null}
      <span>{children}</span>
    </button>
  );
});
Review का सही प्रश्न “Button अच्छा दिखता है?” नहीं, बल्कि “क्या यह API अलग product teams के लिए स्थिर है?” है। Existing callers, ref forwarding, disabled semantics, loading में duplicate submit और focus visibility को test करें।
Storybook को specification बनाएं
हर महत्वपूर्ण state story में दिखना चाहिए। Story नहीं होगी तो designer उसका review नहीं कर पाएगा, developer stable story ID से test नहीं लिख पाएगा और visual diff अस्पष्ट होगा। Existing stories को हटाने के बजाय missing states जोड़ें और story ID बदले तो कारण दर्ज करें।
import type { Meta, StoryObj } from "@storybook/react-vite";
import { Button } from "./Button";

const meta = {
  title: "Design System/Button",
  component: Button,
  parameters: {
    layout: "centered",
    a11y: {
      test: "error"
    }
  },
  argTypes: {
    variant: {
      control: "select",
      options: ["primary", "secondary", "danger"]
    },
    size: {
      control: "select",
      options: ["sm", "md", "lg"]
    },
    loading: { control: "boolean" },
    disabled: { control: "boolean" }
  }
} satisfies Meta<typeof Button>;

export default meta;
type Story = StoryObj<typeof meta>;

export const Primary: Story = {
  args: {
    children: "Save changes",
    variant: "primary"
  }
};

export const Danger: Story = {
  args: {
    children: "Delete",
    variant: "danger"
  }
};

export const Loading: Story = {
  args: {
    children: "Saving",
    loading: true
  }
};

export const AllStates: Story = {
  render: () => (
    <div className="flex flex-wrap items-center gap-3">
      <Button variant="primary" size="sm">Small</Button>
      <Button variant="primary" size="md">Medium</Button>
      <Button variant="primary" size="lg">Large</Button>
      <Button variant="secondary">Secondary</Button>
      <Button variant="danger">Danger</Button>
      <Button disabled>Disabled</Button>
      <Button loading>Loading</Button>
    </div>
  )
};
parameters.a11y.test = "error" accessibility addon के violation को component test failure बनाता है। इससे समस्या pull request में जल्दी दिखती है, लेकिन copy का अर्थ, keyboard flow और screen reader comprehension फिर भी इंसान जांचे।
CI में component, a11y और visual checks
Vite आधारित Storybook में @storybook/addon-vitest stories को browser tests में बदलता है। CI में npm run test:storybook -- --run चलाएं। पुराने test-runner workflow की तरह component और a11y test के लिए अलग served Storybook जरूरी नहीं; custom screenshot test के लिए built Storybook server रखें।
पहले high-value stories का screenshot लें। Animation, तारीख, external font या random ID वाली हर story जोड़ने से snapshots noisy हो सकते हैं और वास्तविक regression छिप सकता है।
CI चालू करने से पहले target app में npx playwright test tests/button.visual.spec.ts --update-snapshots एक बार चलाएं, baseline image की मानवीय समीक्षा करें और उसे repository में commit करें। Baseline न होने पर Playwright के पास तुलना के लिए कुछ नहीं होगा और पहला CI run fail होगा।
import { expect, test } from "@playwright/test";

test("button all states visual snapshot", async ({ page }) => {
  await page.goto("http://127.0.0.1:6006/iframe.html?id=design-system-button--all-states");
  await expect(page).toHaveScreenshot("button-all-states.png", {
    fullPage: true,
    animations: "disabled"
  });
});
GitHub Actions में token generation, Vitest story tests, Storybook build और Playwright visual test को अलग स्पष्ट चरणों में रखें:
name: design-system-quality

on:
  pull_request:
    paths:
      - "tokens.json"
      - "scripts/build-tokens.mjs"
      - "src/components/**"
      - "src/styles/**"
      - ".storybook/**"
      - "tests/**"
      - "package.json"
      - "package-lock.json"

jobs:
  check:
    runs-on: ubuntu-latest
    steps:
      - uses: actions/checkout@v4
      - uses: actions/setup-node@v4
        with:
          node-version: 22
          cache: npm
      - run: npm ci
      - run: npm run tokens:build
      - run: npx playwright install --with-deps chromium
      - run: npm run test:storybook -- --run
      - run: npm run build-storybook
      - run: >
          npx concurrently -k -s first -n server,tests
          "npx http-server storybook-static -p 6006"
          "npx wait-on http://127.0.0.1:6006 && npm run test:visual"
CI fail हो तो Claude Code को failing story ID, axe violation, बदली हुई files और visual diff दें। पूरी secret-bearing log paste न करें। Agent से पहले failure reproduce और फिर सबसे छोटा fix मांगें; snapshot को केवल pass कराने के लिए बिना देखे update न करें।
Figma integration की सुरक्षित सीमा
Figma Variables token work का मजबूत input हैं, पर शुरुआती चरण में automatic two-way sync जोखिम भरा है। Unapproved experiment, पुराने component names और private design notes production tokens में आ सकते हैं। पहले report बनाएं, फिर इंसान तय करे कि कौन-सा पक्ष source of truth है।
| क्षेत्र | सुरक्षित automation | इससे बचें |
|---|---|---|
| Figma Variables | export लेकर tokens.json से तुलना | production tokens को सीधे overwrite करना |
| Figma Components | states और prop candidates इकट्ठा करना | React API अपने आप तय करना |
| Figma comments | unresolved प्रश्नों का सार बनाना | final design intent का अनुमान लगाना |
| Storybook links | design review में story URL जोड़ना | Storybook को design approval मानना |
Difference report के लिए localized prompt:
figma-tokens-export.json और tokens.json पढ़ें।
इन बिंदुओं वाली Markdown report बनाएं:
1. Figma में मौजूद लेकिन code में अनुपस्थित tokens
2. code में मौजूद लेकिन Figma में अनुपस्थित tokens
3. समान semantic tokens के values में अंतर
tokens.json न बदलें और tokens का नाम न बदलें। focus, danger और text color के जोखिम भरे अंतर चिन्हित करें।
उद्देश्य sync करना नहीं, बल्कि ऐसा छोटा और reviewable diff बनाना है जिसे designer और engineer दोनों समझ सकें। Report को pull request artifact रखें ताकि निर्णय बाद में खोजा जा सके।
चार स्पष्ट उपयोग के मामले
उपयोग मामला 1: SaaS admin UI का Button एक करना
इनपुट: अलग screens में मौजूद button classes, props, stories और screenshots। Claude Code का आउटपुट: usage inventory, compatibility props, token mapping और केवल एक screen का migration diff। मानव जांच: billing या destructive action की semantics, keyboard operation और visual diff। पहले एक screen migrate करने से पुराने callers टूटे तो कारण सीमित रहता है।
उपयोग मामला 2: White-label product में brand बदलना
इनपुट: हर customer के primitive brand colors और साझा semantic token schema। Claude Code का आउटपुट: per-brand CSS variables, typed token map और Storybook theme switch। मानव जांच: contrast, legal brand rules और focus/danger colors। Semantic layer स्थिर रखकर customer-specific raw values बदलना component code को सरल रखता है।
उपयोग मामला 3: Legacy CSS से token candidates निकालना
इनपुट: repeated hex colors, spacing values और प्रभावित selectors। Claude Code का आउटपुट: frequency report, प्रस्तावित primitive/semantic mapping और migration table। मानव जांच: दिखने में समान values का अर्थ सच में समान है या नहीं। एक commit में सब replace न करें; high-value component से शुरू करें और snapshot diff देखें।
उपयोग मामला 4: Marketing और inquiry funnel स्थिर करना
इनपुट: CTA buttons, pricing cards, form states और conversion pages। Claude Code का आउटपुट: साझा tokens, component variants, error/loading stories और visual test candidates। मानव जांच: copy, प्राथमिक CTA, mobile hierarchy और experiment का business meaning। Consistent states visitor का भरोसा बढ़ाते हैं और A/B change को मापना आसान करते हैं।
गलतियां और उनके कारण व सुधार
गलती: primitive token सीधे component में फैलाना। कारण यह है कि blue-600 लिखना जल्दी लगता है। बाद में brand बदलने पर हर component खोजना पड़ता है। सुधार: component को semantic या component token पर निर्भर करें और raw value primitive layer तक सीमित रखें।
गलती: Storybook local में चलता है, CI में नहीं। कारण setup को documentation समझना है। परिणाम यह कि story या addon silently टूट सकता है। सुधार: vitest --project=storybook, Storybook build और चुने हुए visual tests pull request में अनिवार्य करें।
गलती: हर story का snapshot बनाना। कारण coverage बढ़ाने की जल्दबाजी है। Animation, dates और fonts noisy diff बनाते हैं। सुधार: dynamic content freeze करें और पहले checkout, billing या destructive action जैसे high-value states चुनें।
गलती: axe pass को पूर्ण accessibility मानना। कारण automated result को final judgment समझना है। Axe context, wording और screen reader comprehension नहीं जानता। सुधार: keyboard-only flow, focus order और प्रमुख screen reader interaction की मानव जांच जोड़ें।
गलती: Claude Code को पूरी migration एक बार में देना। कारण prompt में file scope और acceptance criteria का अभाव है। सुधार: component-by-component काम करें, tests और changed-file list मांगें, और API change को merge से पहले इंसान स्वीकार करे।
गलती: Figma और code को बिना review दो-तरफा sync करना। कारण “single source of truth” को automatic overwrite समझना है। सुधार: पहले difference report, फिर approved token change और उसके बाद generated outputs बनाएं।
Merge से पहले checklist
- Token names केवल appearance नहीं, उपयोग का अर्थ बताते हैं।
- Component props कम, typed और existing callers के लिए stable हैं।
- disabled, loading, error, focus और hover states Storybook में हैं।
- Keyboard-only operation और focus order इंसान ने जांचे हैं।
- ARIA केवल जरूरत पर है; native HTML के व्यवहार को दोहराया नहीं गया।
- Visual snapshot changes को देखकर approve किया गया है।
- Figma differences report के रूप में सुरक्षित हैं।
- Claude Code ने केवल मांगे गए file areas बदले हैं।
- Prompt, logs, stories और screenshots में secret या private customer data नहीं है।
इस checklist को project instructions में रखें। अगले session में Claude Code वही acceptance criteria दोबारा इस्तेमाल कर सकेगा और reviewer को हर बार नियम नए सिरे से लिखने नहीं पड़ेंगे।
अगला एक कदम चुनें
पहले प्रमाणित करें कि tokens.json से CSS variables और TypeScript constants बनते हैं, Button stories सभी states render करती हैं और CI Storybook component, accessibility तथा visual checks दोहरा सकता है। Figma integration को report-only रखें जब तक टीम source of truth पर सहमत न हो। Team implementation, Storybook adoption या accessibility workflow पर संरचित सहायता के लिए Claude Code training और consultation देखें।
वास्तव में जांचे गए परिणाम
22 जुलाई 2026 को इस लेख के build-tokens.mjs को पूर्ण tokens.json उदाहरण के साथ अलग निकालकर चलाया गया। Process exit code 0 के साथ समाप्त हुआ, 25 CSS custom properties और TypeScript token map बने, और {primitive.color.blue.600} reference #2563eb में resolve हुआ। Unknown reference वाले negative fixture ने non-zero exit दिया और Unknown token reference दिखाया। JSON snippets parse किए गए, code fences और internal links जांचे गए, तथा Storybook commands को मौजूदा official Vitest addon और migration documentation से मिलाया गया। इस site repository में Storybook install नहीं है, इसलिए component और visual tests को अपनाने से पहले target application में चलाना जरूरी है।
संबंधित लेख
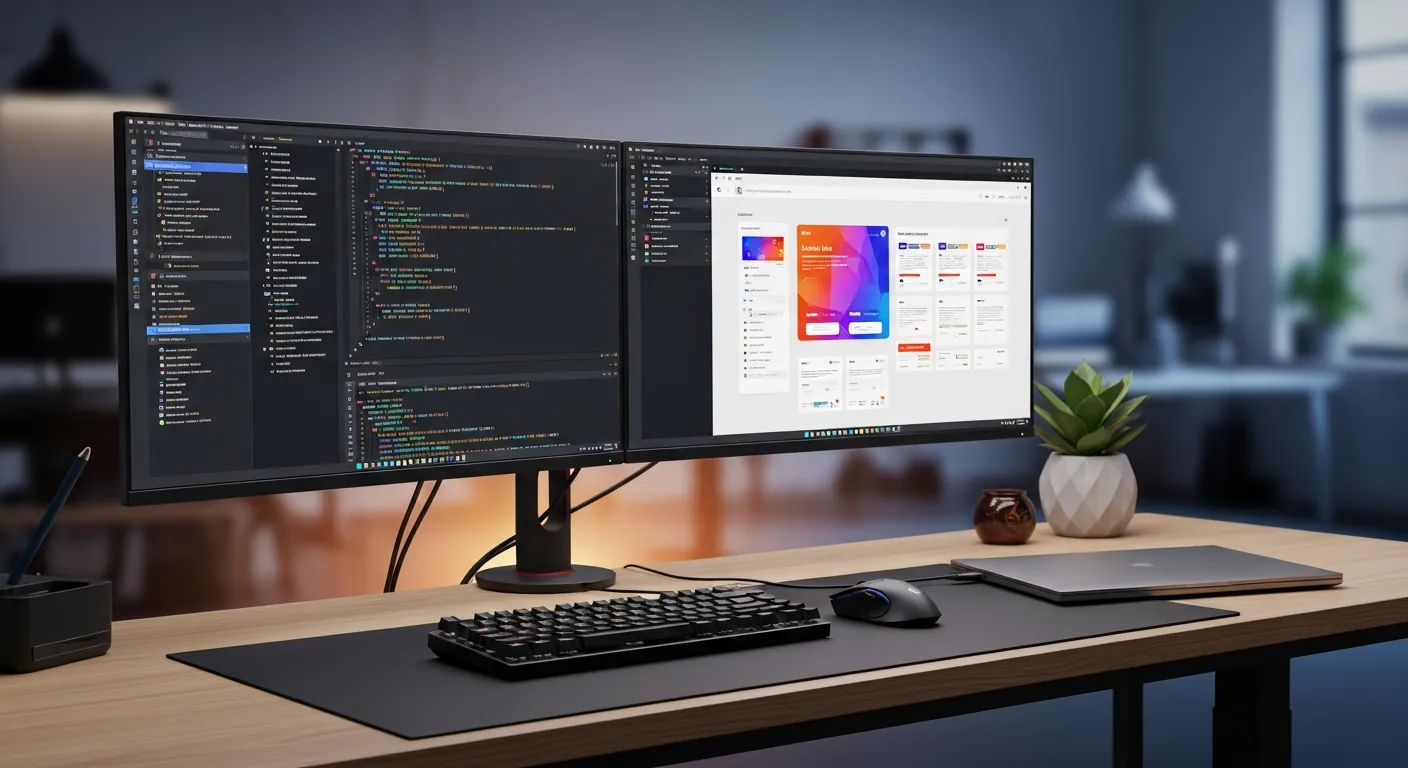
Claude Code के साथ Design Tokens: Figma से CSS Variables, Tailwind और React तक
Claude Code से design tokens लागू करें: Style Dictionary, CSS variables, Tailwind और React सहित।

Claude Code से production CSS styling: layers, tokens और visual checks
Claude Code से CSS layers, tokens, container queries, dark mode, accessibility और visual regression संभालने की guide.
Claude Code से CSS variables और theme token बनाना
Claude Code से CSS custom properties, var() fallback, theme token और dark mode लागू करें.
मुफ़्त PDF: Claude Code cheatsheet
Email डालें और commands, review habits तथा safe workflow वाली एक-page PDF पाएँ.
हम आपका data सुरक्षित रखते हैं और spam नहीं भेजते.

लेखक के बारे में
Masa
Claude Code workflow और team adoption पर काम करने वाला engineer.